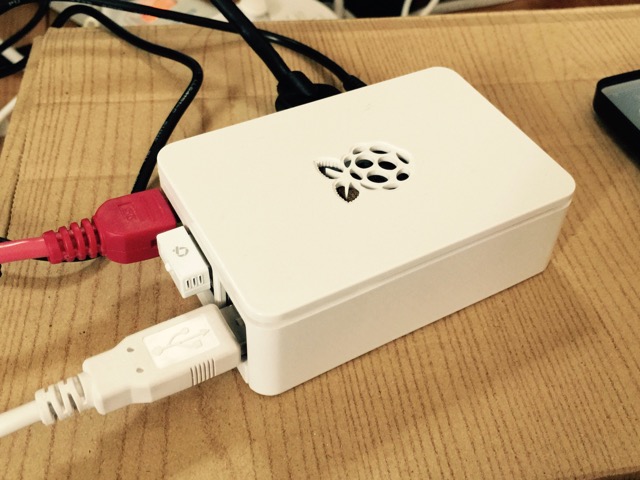
今更ながら Raspberry Pi 2 を入手しました。
あちこちのサイトを見ながらセットアップしたのですが、自分向けにまとめてみました。
インストールするOSはRasbian、使用するPCはMac、主な用途はヘッドレスサーバです。
揃えたもの
- Raspberry Pi 2 B 本体
- SDカード 16GB
- ケース
- Wi-Fiモジュール(GW-USNANO2A)
- USB ACアタダプタ
- micro USB ケーブル
- キーボード
- マウス
- HDMI接続のディスプレイ
- HDIケーブル
- イーサネットケーブル
ダウンロード
(1) 以下のサイトから Rasbian OS のイメージファイルをダウンロードします。
今回は通常版(LITEでない方)を使いました。
Raspbian
ダウンロードは1時間くらいかかります。
(2) ダウンロードしたらZipファイルを解凍して、imgファイルにしておきます。
SDカードへのインストール
(1) ターミナルアプリを起動します。
(2) ファイルシステム上にあるデバイス名を調べます。
$ df

Filesystem                        512-blocks      Used Available Capacity  iused    ifree %iused  Mounted on

/dev/disk1                         974700800 598106040 376082760    62% 74827253 47010345   61%   /

devfs                                    380       380         0   100%      660        0  100%   /dev

map -hosts                                 0         0         0   100%        0        0  100%   /net

map auto_home                              0         0         0   100%        0        0  100%   /home
(3) SDカードをMacに接続します。
(4) SDカードのデバイス名を調べます。
$ df

Filesystem                        512-blocks      Used Available Capacity  iused    ifree %iused  Mounted on

/dev/disk1                         974700800 598106040 376082760    62% 74827253 47010345   61%   /

devfs                                    380       380         0   100%      660        0  100%   /dev

map -hosts                                 0         0         0   100%        0        0  100%   /net

map auto_home                              0         0         0   100%        0        0  100%   /home

/dev/disk3s1                          122768     40800     81968    34%      512        0  100%   /Volumes/NO NAME
SDカードをさしこむ前と比較すると、一番下の行が増えてます。これがSDカードです。
ファイルシステム上のデバイス名が「/dev/disk3s1」で、マウントされているボリューム名が「/Volumes/NO NAME」す。
(5) SDカードをアンマウントします。
$ sudo diskutil umount /Volumes/NO\ NAME

Password:

Volume NO NAME on disk3s1 unmounted
(6) SDカードにイメージファイルの内容を書き込みます。
$ sudo dd bs=1m if=./2016-03-18-raspbian-jessie.img of="/dev/rdisk3"

3847+0 records in

3847+0 records out

4033871872 bytes transferred in 267.713917 secs (15067845 bytes/sec)
「of」に書き込み先のデバイス名を指定するのですが、元の名前の先頭に「r」を追加して、末尾の「s1」を削除したものになります。
5分くらいかかります。
起動
(1) SDカードを Raspberry Pi に差し込みます。
(2) キーボード、マウス、ディスプレイをつなげます。
(3) 有線でインターネットに接続します。
(3) 最後に電源をつなげると、Raspberry Pi が起動します。
キーボードの設定
(1) デスクトップ画面から Menu -> Preference -> Raspberry Pi Configuration で設定画面を開きます。
(2) Localisationタブを選び、「Set Keyboard…」ボタンを押して、Keyboard Layout画面を開きます。
(3) 「HHKB Lite 2」の場合は、「Japan – Japanese」を選んで、OKボタンを押します。
OSのアップデート
(1) 「Terminal」を起動します。
(2) OSを最新の状態にします。
$ sudo apt-get update && sudo apt-get -y dist-upgrade
(3) ファームウェアを最新の状態にします。
$ sudo rpi-update
(4) 再起動します。
$ sudo reboot
raspi-config の設定
(1) raspi-config を起動します。
$ sudo raspi-config
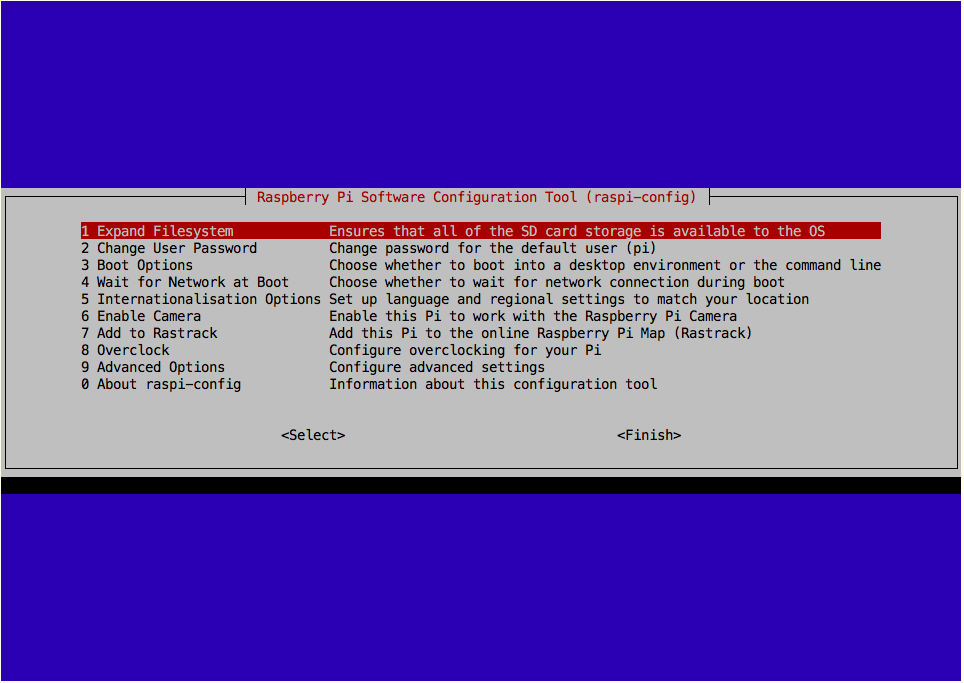
(2) ファイルシステムの拡張を行います。
1 Expand Filesystem
選択すると実行されます。これを行わないと/rootがすぐに満杯になります。
(3) パスワードの変更
2 Change User Password
「pi」アカウントのパスワードを変更します。
(4) 起動オプション
3 Boot Options -> Console
CUIで起動するように変更します。
(5) 言語を設定します。
5 Internationalisation Options -> I1 Change Locale
[ ] en_GB.UTF-8 UTF-8
[*] en_US.UTF-8 UTF-8
[*] ja_JP.UTF-8 UTF-8
([Ctrl]+v で1ページ送り)
Default locale for the system environment:
ja_JP.UTF-8
(6) タイムゾーンを設定します。
5 Internationalisation Options -> I2 Change Timezone
Asia / Tokyo
(7) raspi-config終了時に再起動するか聞いてくるので、再起動します。
sshでの接続
(1) Raspberry Pi の IPアドレスを調べます。
Raspberry Pi上でifconfigコマンドを使うか、DHCPサーバから使用されているIPアドレスを見るとか。
(2) Macからsshで接続します。
$ ssh pi@192.168.xx.xx
初期パスワードは「raspberry」です。
(3) この時、以下のようなエラーが出た場合は、Macに前のホストの公開鍵が残っているのが原因なので、ssh-keygenを使って削除してから、再試行します。
@@@@@@@@@@@@@@@@@@@@@@@@@@@@@@@@@@@@@@@@@@@@@@@@@@@@@@@@@@@

@    WARNING: REMOTE HOST IDENTIFICATION HAS CHANGED!     @

@@@@@@@@@@@@@@@@@@@@@@@@@@@@@@@@@@@@@@@@@@@@@@@@@@@@@@@@@@@

IT IS POSSIBLE THAT SOMEONE IS DOING SOMETHING NASTY!

Someone could be eavesdropping on you right now (man-in-the-middle attack)!

It is also possible that a host key has just been changed.

The fingerprint for the ECDSA key sent by the remote host is

SHA256:8GbcugJQ9+jorhBq5tdIuG3nMriSy7zxxxxxxxxxxxx.

Please contact your system administrator.

Add correct host key in /Users/xxxxx/.ssh/known_hosts to get rid of this message.

Offending ECDSA key in /Users/xxxxx/.ssh/known_hosts:3

ECDSA host key for 192.168.xx.xx has changed and you have requested strict checking.

Host key verification failed.
ssh-keygen -R 192.168.xx.xx

# Host 192.168.xx.xx found: line 3

/Users/xxxxx/.ssh/known_hosts updated.

Original contents retained as /Users/xxxxx/.ssh/known_hosts.old
Wi-Fi の設定
(1) 無線LANモジュールを接続します。
(2) 無線LANモジュールが認識されていることを確認します。
$ lsusb

...

Bus 001 Device 004: ID 2019:ab2a PLANEX GW-USNano2 802.11n Wireless Adapter [Realtek RTL8188CUS]

...
(3) Wi-Fiの設定を書き込みます。
$ sudo sh -c 'wpa_passphrase SSID PASSPHRASE >> /etc/wpa_supplicant/wpa_supplicant.conf'
「SSID」にはWi-FiのSSID、「PASSPHRASE」には同じくパスフレーズ(パスワード)を入力します。
(4) コメントのパスフレーズを削除
$ sudo vi /etc/wpa_supplicant/wpa_supplicant.conf
先ほど入力したパスフレーズがコメントアウトされて書き込まれている(#psk=の行)ので削除しておきます。
(5) ネットワーク機能を再起動します。
$ sudo /etc/init.d/networking restart
(6) IPアドレスが取得できたことを確認します。
$ ifconfig

...

wlan0     Link encap:Ethernet  HWaddr 00:22:cf:xx:xx:xx

          inet addr:192.168.xx.yy  Bcast:192.168.xx.255  Mask:255.255.255.0

...
(7) IPアドレスを固定にします。
$ sudo vim /etc/network/interfaces

...

allow-hotplug wlan0

iface wlan0 inet static

address 192.168.xx.zzz

netmask 255.255.255.0

gateway 192.168.xx.1

wpa-conf /etc/wpa_supplicant/wpa_supplicant.conf

...
(8) 再起動します。
$ sudo reboot
(9) 無線LANのIPアドレスが指定したものになっていることを確認します。
$ ifconfig

...

wlan0     Link encap:Ethernet  HWaddr 00:22:cf:xx:xx:xx

          inet addr:192.168.xx.zzz  Bcast:192.168.xx.255  Mask:255.255.255.0

...